How to Hold a Pistol With Both Hands in 10 Essential Steps
Position your dominant hand high on the pistol grip, wrapping your fingers firmly around its base. This gives you solid control and helps steady your aim.
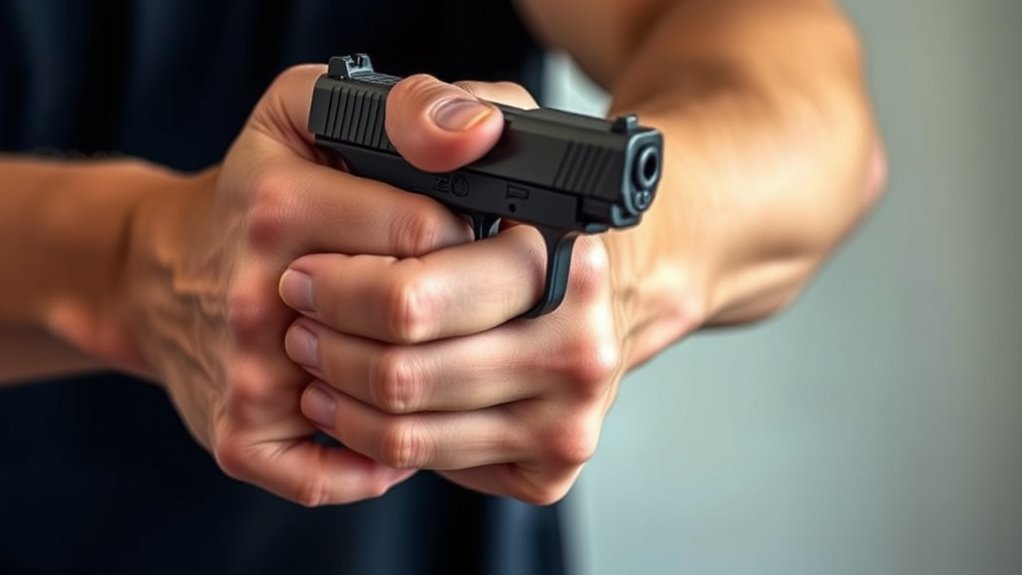
Place your support hand at your lower chest, sliding it smoothly under the grip for maximum contact. This two-handed hold is key for stability and accuracy.
Align your thumbs safely, pointing forward and clear of moving parts. It’s important to keep your thumbs out of the way to avoid injury.
Apply balanced pressure front-to-back with your dominant hand and inward side-to-side with your support hand. This creates a strong, stable grip.
Slightly cant your wrists and bend your elbows to manage recoil effectively. This helps absorb the kick and keeps you on target.
Find the grip’s sweet spot for comfort and control, and keep going to uncover more details that boost your shooting skills. Mastering this technique will make a big difference in your pistol handling.
Key Takeaways
- Place the dominant hand high on the backstrap with thumbs forward and aligned along the barrel for maximum control and recoil absorption.
- Slide the support hand smoothly under the grip, pressing the palm firmly and keeping wrists slightly canted forward for stability.
- Keep wrists straight and elbows slightly bent to absorb recoil while maintaining a firm, consistent grip pressure from both hands.
- Apply balanced front-to-back pressure with the dominant hand and inward side-to-side pressure with the support hand to reduce muzzle flip.
- Find and maintain a grip “sweet spot” by adjusting tension for comfort, control, and quick follow-up shots.
Position Your Dominant Hand High on the Pistol Grip
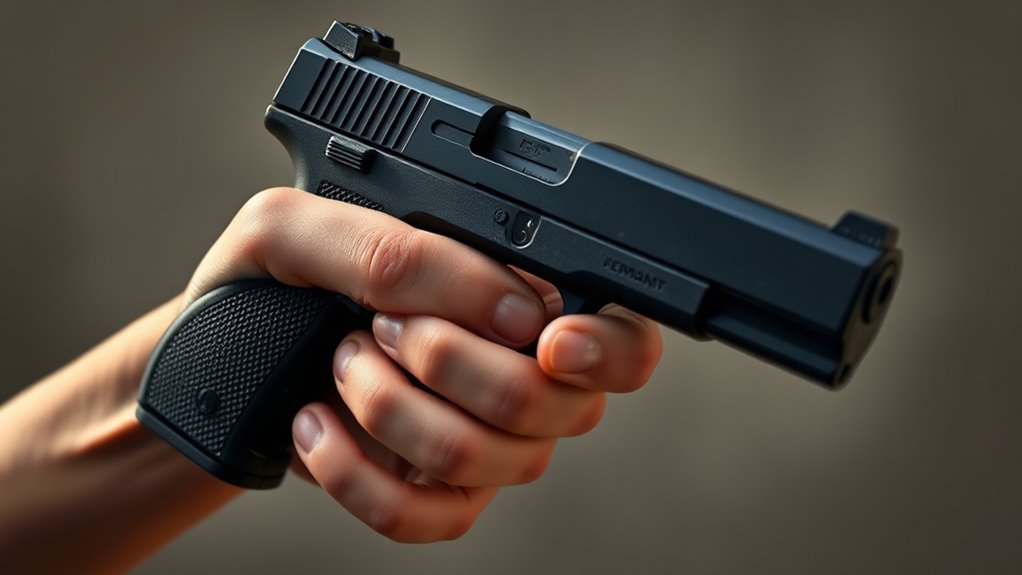
When you position your dominant hand high on the pistol grip, you gain better control and reduce recoil. Place your dominant hand as high as possible on the backstrap to maximize control and help absorb the recoil effectively.
Make sure the web of your hand fits snugly against the grip without any gaps. This prevents recoil from escaping and disrupting your shot.
Keep your thumb pointing forward, aligned with the barrel, to boost stability and control. This high grip position lessens muzzle flip, letting you manage recoil more efficiently and maintain accuracy.
Wrap Your Fingers Firmly Around the Grip Base
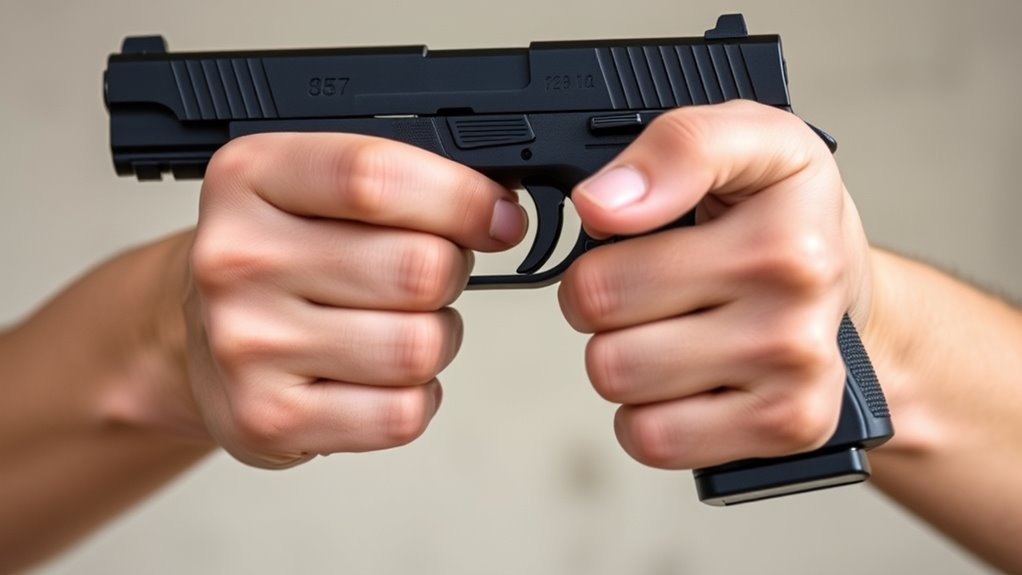
Although your dominant hand provides primary control, wrapping your lower three fingers firmly around the base of the pistol grip guarantees stability and helps manage recoil. You want your fingers snug and evenly spread to avoid gaps that reduce control.
Keep your grip firm but not so tight that it causes fatigue or trembling. Make sure your fingers don’t interfere with the trigger or slide, ensuring safe operation.
Your non-dominant hand will complement this grip by wrapping around your dominant hand’s fingers, adding support and control.
| Finger Position | Grip Pressure | Control Effect |
|---|---|---|
| Snug & Even | Firm | Improved Stability |
| No Gaps | Consistent | Better Recoil Control |
| Clear Trigger | Moderate | Safe Operation |
| Base Wrapped | Steady | Enhanced Grip |
| Fingers Aligned | Balanced | Reduced Fatigue |
Start With Your Support Hand at Your Lower Chest
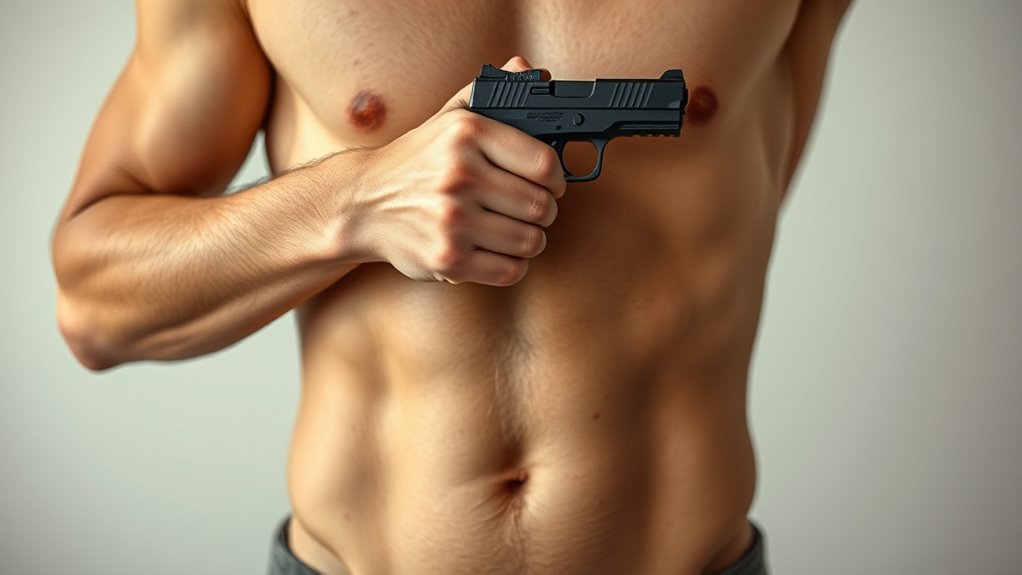
Since a stable foundation is essential for accuracy, start by placing your support hand at your lower chest. This position establishes a solid starting point and helps maintain proper arm extension and balance while shooting.
Keep your support hand relaxed but ready—it should feel natural. This way, you can smoothly shift it as you bring the pistol into position.
Once the gun is raised, your support hand plays a vital role in controlling recoil, minimizing muzzle movement, and improving follow-up shot speed. By positioning your support hand at your lower chest, you set the stage for a consistent grip and enhanced shooting stability.
This deliberate placement guarantees you’re prepared to manage the firearm effectively from the very beginning of your shooting stance.
Slide Your Support Hand Under the Pistol Grip
As you bring your support hand into position, slide it smoothly under the pistol grip to guarantee full contact with both the front and back straps. This ensures maximum grip stability and control.
When you slide your support hand, focus on these key points:
- Press your palm firmly against the bottom of the grip for solid support.
- Wrap your support fingers around your firing hand’s fingers comfortably.
- Keep your support hand high on the grip, aligned with the bore line.
- Position your support hand’s base knuckles parallel to the slide.
- Maintain a firm yet relaxed grip to manage recoil effectively.
Align Your Thumbs Safely Away From the Slide and Hammer
Make certain your thumbs point straight forward, away from the slide and hammer, to avoid injury during recoil. Push the base of each thumb outward and downward, keeping them clear of the pistol’s moving parts.
This safe thumb alignment helps prevent pinching and ensures better control while shooting. It’s a simple adjustment that makes a big difference in safety and handling. Just keep those thumbs out of the way!
Thumb Placement Safety
When gripping a pistol with both hands, you’ll want to keep your thumbs safely away from the slide and hammer to avoid injury. Proper thumb placement is essential for safety and control.
Position your thumbs so they don’t rest or press against any moving parts. Here’s how to guarantee thumb placement safety:
- Flag your thumbs outward and slightly upward
- Align thumbs along the frame or outside the grip
- Never place thumbs directly over the slide or hammer
Make sure to maintain a clear distance from moving components to prevent pinching. This helps reduce the risk of bruising or accidental activation during recoil.
Avoid Slide Contact
Although gripping your pistol firmly is important, you don’t want your thumbs to come into contact with the slide or hammer. Position your thumbs side to side, flagging them outward and slightly upward from the slide to avoid injury.
When applying pressure with your non-firing hand, keep your thumbs relaxed and clear of the slide lock and hammer to prevent pinching or bruising during recoil. Regularly check your grip to assure your thumbs maintain a natural position away from moving parts.
This helps you stay in control without risking accidental contact with sharp edges. Avoid letting your thumbs rest on or near these components, especially during rapid shooting, so you can shoot safely and comfortably with both hands.
Prevent Hammer Injuries
Keeping your thumbs clear of the slide is only part of the safety puzzle; you also need to position them away from the hammer to prevent injuries. When you go ahead and grip your pistol, align your thumbs safely to avoid pinching or bruising during recoil.
Here’s how to do it much as possible:
- Point your thumbs away from the slide and hammer.
- Place thumbs on opposite sides of the frame.
- Avoid resting thumbs directly on moving parts.
Maintain a firm grip without pressing on the hammer or slide. And always check your hand placement before every shot. It’s a simple habit that can save you from a painful injury.
Lock Your Pistol Grip by Aligning Knuckles and Wrists
To lock your pistol grip effectively, align the second knuckles of both hands while keeping your wrists straight and parallel. This alignment creates a secure, consistent grip that enhances your control and reduces recoil.
Position your wrists so they’re parallel, then drive the heel of your dominant hand upward and forward. At the same time, pull your pinky inward and upward to lock the grip firmly.
Stabilize the offhand wrist by applying side-to-side pressure, which keeps your knuckles properly aligned and prevents slippage during firing. By focusing on this precise knuckle and wrist positioning, you’ll maintain better control.
This way, your grip stays locked in place and you’re ready for accurate, steady shooting under recoil. It’s all about that solid connection to keep everything steady.
Apply Balanced Pressure Front-to-Back and Side-to-Side
You’ll want to apply firm pressure from front to back on the grip to stabilize your pistol and manage recoil. At the same time, use equal side-to-side pressure with both hands to keep your aim steady.
Balancing these forces helps you control the firearm smoothly and improves accuracy. It’s all about finding that sweet spot where everything feels steady and natural.
Front-to-Back Pressure
When you apply firm pressure from the front of the grip to the back, you enhance your control and stability over the pistol. This balanced front-to-back pressure helps lock the firearm securely in your hands, reducing muzzle flip and improving accuracy.
To get it right, remember to squeeze the entire firearm evenly from front to back. Use your non-dominant hand to push forward, and let your dominant hand pull back to create tension.
Make sure to maintain consistent pressure during firing to manage recoil. Also, adjust your grip firmness to stay comfortable without tiring your hands. It’s all about finding that sweet spot!
Side-to-Side Grip
Although front-to-back pressure is essential, applying balanced side-to-side grip pressure is just as important for stabilizing your pistol. You want to use your dominant hand to push front-to-back while your off hand applies inward side-to-side force.
This balanced grip creates a firm, stable hold that resists any side-to-side movement during recoil. Keep both hands working together to produce 360-degree inward pressure, which helps reduce muzzle flip and improves accuracy.
Maintaining consistent pressure on both sides throughout firing prevents your hands from shifting and keeps your shots steady. By applying equal side-to-side and front-to-back pressure, you set yourself up for better control and quicker follow-up shots without losing stability.
Balanced Recoil Control
Since managing recoil effectively demands more than just a firm grip, you need to apply balanced pressure both front-to-back with your dominant hand and side-to-side with your off hand. This combination helps stabilize the pistol and control muzzle flip during rapid fire.
To master balanced recoil control, focus on applying firm, consistent pressure front-to-back with your dominant hand. Then, use your off hand to exert inward, side-to-side pressure around the grip.
Make sure to maintain equal grip tension on both hands to prevent muzzle movement. Think of it as creating a 360-degree inward force that stabilizes the pistol.
Finally, adjust your grip tension to find the “sweet spot” for smooth recoil management without getting tired. It’s all about balance and comfort working together.
Slightly Cant Your Wrists to Secure Your Grip Lock
By slightly canting your wrists forward as you extend your arms, you lock your grip more securely on the pistol. This small adjustment creates a stable, firm contact between your hands and the firearm, improving overall control.
When you tilt your wrists just enough to feel natural and comfortable, you increase friction between your hands, which helps reduce muzzle flip during rapid or follow-up shots. This slight forward cant isn’t about forcing tension but about finding the right angle that locks your grip without causing strain.
Consistently applying this technique enhances grip stability and keeps your hands aligned with the bore line. This makes your shots more accurate and manageable under recoil. Remember, the cant should feel effortless yet purposeful.
Bend Your Elbows Slightly to Help Manage Recoil
After locking your grip with a slight forward cant in your wrists, the next step is to bend your elbows just a bit. This small adjustment helps you manage recoil more effectively by absorbing and redirecting forces, reducing muzzle rise.
Keeping your elbows slightly bent creates a stable shooting platform, preventing shock from transferring directly to your shoulders. It also improves control through rapid fire and boosts comfort by reducing muscle fatigue.
Focus on these benefits:
- Absorbs and redirects recoil forces
- Reduces muzzle rise for better accuracy
- Prevents arms from locking, enhancing stability
- Allows quick, flexible recoil adjustments
- Minimizes muscle fatigue during extended shooting
Bending your elbows slightly sets you up for better control and faster follow-up shots. It’s a simple tweak that makes a big difference.
Find Your Grip Sweet Spot for Comfort and Control
To find your grip sweet spot, start by balancing your grip pressure so it’s firm but not tiring. Adjust your hand placement until your knuckles align comfortably for better control.
Balancing Grip Pressure
When you grip a pistol, applying pressure firmer than a handshake—but not so tight that your hand tires or shakes—is key to maintaining control. You need to find the balance that lets you manage recoil and keep the gun steady.
Focus on distributing pressure evenly around the grip, balancing side-to-side and front-to-back forces. To find your sweet spot, try adjusting your grip pressure until the pistol feels stable and recoil is manageable.
Remember, consistency is crucial for accuracy. Keep these points in mind:
- Apply firm but comfortable pressure
- Distribute force evenly around the grip
- Experiment with pressure levels to find your sweet spot
- Maintain steady grip tension during firing
- Adjust tension based on hand size, gun type, and shooting distance
Adjusting Hand Position
| Hand Position | Purpose |
|---|---|
| Dominant hand high | Secure, balanced grip. |
Keeps your hold steady and strong. Makes sure you’re in control. |
| Knuckle alignment | Grip lock for stability. |
|---|---|
| Thumb placement | Control and fatigue reduction. |
Gives you better maneuverability. Also helps your hands last longer without tiring. |
Frequently Asked Questions
How to Properly Grip a Pistol With Both Hands?
You grip the pistol high on the backstrap, no gaps. Wrap your support hand around your dominant hand, thumbs pointing forward with space between them. Apply firm, even pressure to control recoil and maintain accuracy.
What Is the 3-3-3 Rule in Self-Defense?
When seconds count, the 3-3-3 rule tells you to act fast: recognize a threat within three seconds, strike three times, and escape three steps. You’ll increase your chances of staying safe by moving decisively.
What Does “Mexican Carry” Mean?
“Mexican carry” means you’re carrying a handgun tucked into your waistband without a holster. It’s informal, offers quick access, but isn’t very safe since the gun can fall out or accidentally discharge more easily.
What Is the 26 Pistol Rule?
The 26 pistol rule means you should hold your hands about 26 inches apart for the best control. It helps you manage recoil better and stay steady, improving your accuracy and target acquisition every time you shoot.
Conclusion
Now that you’ve locked your hands like a fortress around your pistol, you’re ready to face the recoil’s dance with steady grace. Your grip is the bridge between you and your aim, a silent handshake of power and control.
With each step, you’ve built a rhythm—a steady drumbeat of confidence. So hold tight, breathe steady, and let your hands tell the story of precision, strength, and readiness every time you draw.
Remember, mastering how to hold a pistol with both hands is key to improving accuracy and managing recoil effectively. This solid two-handed grip enhances your stability and control, making every shot count. Keep practicing these essential steps, and your confidence will grow alongside your skills.