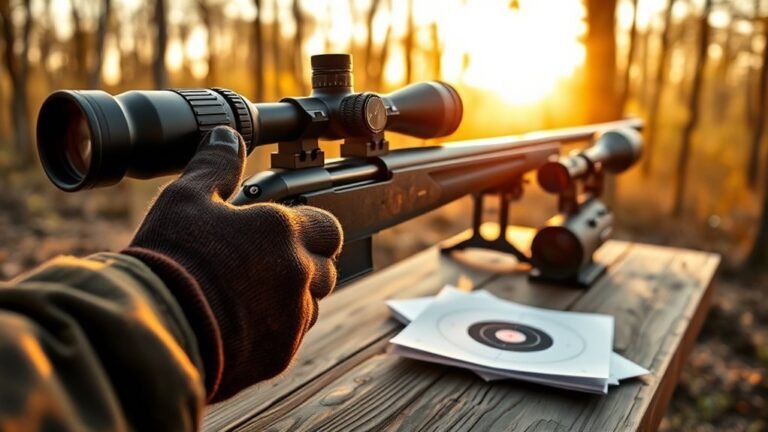
How to Zero a Rifle at 25 Yards for 100 Yards in 10 Simple Steps
To zero your rifle at 25 yards for 100 yards, start by securely mounting and leveling your scope. This foundation is crucial for consistent accuracy downrange.
Next, bore sight your rifle to align the reticle precisely with the bore, helping you get on paper faster.
Set up a target with a marked reference dot about 1.8 inches below the bullseye. This dot simulates where your shots will land at 25 yards to correspond with a 100-yard zero.
Fire a few initial shots to see where your rounds are impacting.
Then, adjust your scope’s elevation and windage turrets to align the impacts with that reference dot. This simulates your 100-yard zero at the closer distance.
Confirm your adjustments by shooting follow-up groups and checking for consistent accuracy.
Keep fine-tuning as needed to master long-range precision. With practice, zeroing your rifle at 25 yards for 100 yards becomes a reliable and efficient process that saves time at the range.
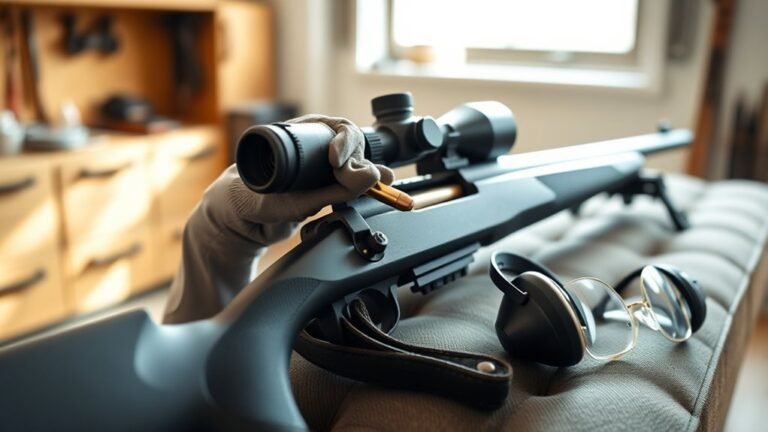
Gather Necessary Equipment and Safety Gear
Before you begin zeroing your rifle at 25 yards for 100 yards, make sure you have all the necessary equipment and safety gear ready. First, verify your scope is properly mounted and capable of precise adjustments. Grab a target with clear bullseyes to track your zeroing progress accurately.
Set up at a safe range with a reliable backstop to catch stray rounds. Use a stable shooting rest or bench to minimize movement during shooting. Don’t forget to wear eye and ear protection to keep yourself safe throughout the session.
Finally, confirm your rifle’s muzzle velocity from manufacturer data or using a chronograph to support accurate ballistic calculations. Having all this prepared will make your zeroing process smooth and effective.
Mount and Level Your Rifle Scope Properly
Although mounting your rifle scope might seem straightforward, securing it properly is essential to maintain accuracy during zeroing. Start by firmly attaching your scope mounts and scope rings using a torque wrench set to the manufacturer’s specifications. This helps prevent any shifts during the zeroing process.
Next, place your rifle stock on a stable, level surface to ensure consistent scope leveling. Use a bubble level or a precision scope level to align the reticle perfectly horizontal and vertical before shooting.
After mounting, double-check the scope level alignment by placing a known level surface or a dedicated leveling device on the scope body. Proper scope leveling guarantees your adjustments correspond accurately to point of impact changes. This streamlines the zeroing process and improves shooting precision.
Bore Sight Your Rifle at 25 Yards
Start by removing the bolt and looking directly through the barrel to align your scope’s reticle with the bore. Use a bore sighting device to project a laser or crosshair that helps you roughly center the reticle on the target.
After making initial adjustments, fire a few test shots to confirm your bullet impacts are close to your aiming point. Then, you can fine-tune your settings for better accuracy.
Align Barrel and Scope
When bore sighting your rifle at 25 yards, remove the bolt and look through the barrel to align it with a distant target. Use a flashlight or laser bore sighter to project a beam through the bore, guaranteeing your reticle is roughly centered on the target.
Next, focus on scope alignment by adjusting the scope’s elevation and windage turrets to bring the reticle onto the bore’s line of sight. This alignment is vital to zero at 25 yards accurately.
Make sure the crosshairs stay centered on the target when looking through the scope. These scope adjustments help ensure your impact point matches the target’s center, setting a solid foundation for fine-tuning your zero during live firing.
Confirm Initial Bullet Impact
After bore sighting your rifle and aligning the scope, fire a single shot at a target 25 yards away to confirm the initial bullet impact. Carefully examine where the bullet impact lands relative to the bullseye.
This first shot gives you a clear reference point for how far off your zero is. Note the direction and distance of the impact from the center of the target. This information is vital for making precise scope adjustments.
If the bullet impact is off-center, adjust your scope accordingly—up, down, left, or right—based on the shot’s deviation. Recording these details ensures you progressively refine your zero.
Confirming the initial bullet impact this way sets a solid foundation for accurate zeroing at 100 yards. It saves time and improves your shooting accuracy.
Set up a Target With a Marked Reference Dot
Although it might seem simple, setting up your target with a marked reference dot is crucial for accurate zeroing at 25 yards. Start by marking a bullseye on your target, then measure 1.8 to 2 inches (about 4 MOA) directly below it to place a small, clearly visible reference dot.
This dot serves as your intended impact point at 25 yards, helping you compensate for bullet drop at 100 yards. Make sure the reference dot is perfectly centered beneath the bullseye and consistent across all targets you use.
When zeroing, aim at the bullseye but adjust your scope so the bullet’s impact aligns with the reference dot. This method ensures precise scope adjustment for longer-range shooting, streamlining your zeroing process efficiently.
Fire Initial Group at the Target’s Bullseye
When you fire your initial group, keep your aim point consistent on the bullseye to get reliable data. Pay close attention to your group size to assess your rifle’s precision.
Then, verify each shot’s placement to determine the necessary adjustments for zeroing. This way, you’ll know exactly what needs tweaking to get that perfect sight picture.
Aim Point Consistency
To guarantee your rifle is zeroed accurately, you’ll want to fire an initial group of 3-5 shots directly at the target’s bullseye from 25 yards. Focus on maintaining a consistent aim point and use a stable rest or bipod to reduce movement.
Each shot should have the same sight picture to produce a reliable impact pattern. Record the group’s placement and note deviations from the bullseye to adjust your scope zero. This process helps you compensate for bullet drop and fine-tune your MOA settings.
| Shot Number | Aim Point Consistency | Impact Deviation (in MOA) |
|---|---|---|
| 1 | Bullseye | 0.5 L |
| 2 | Bullseye | 0.2 R |
| 3 | Bullseye | 0.0 |
Group Size Analysis
Since you want to zero your rifle accurately, firing a tight initial group at the bullseye is essential for measuring bullet impact precisely. A small group size—ideally 3-5 shots within 1 inch at 25 yards—gives you reliable data on the impact point.
This shot grouping directly influences your zeroing adjustments and overall accuracy. If your group is large or scattered, pinpointing the true impact point becomes difficult, risking errors in zeroing.
To achieve minimal group size, use a stable rest and maintain proper shooting technique. By focusing on tight shot grouping, you ensure your zeroing process is both precise and confident, setting a solid foundation for consistent accuracy at 100 yards.
Shot Placement Verification
Although zeroing at 25 yards aims to prepare your rifle for 100-yard accuracy, you need to fire a tight 3-5 shot group directly at the bullseye first. Use a consistent stance, grip, and trigger squeeze to guarantee reliable shot placement and minimize variability.
Once you’ve fired, carefully observe the impact point relative to the bullseye—note if your grouping is high, low, left, or right. Confirm your shots are tightly grouped; if they’re scattered, work on improving your stability before making scope adjustments.
This initial grouping establishes a baseline, helping you determine how much to adjust your scope or holdover for effective zeroing at 100 yards. Accurate shot placement verification is essential for precise zeroing and consistent long-range performance.
Measure Point of Impact Relative to Point of Aim
When you measure the point of impact relative to your point of aim, you’ll see that shots at 25 yards typically land about 1.8 inches low compared to your intended target for a 100-yard zero.
To gauge impact accurately during zeroing, follow these steps:
To gauge impact accurately during zeroing, fire groups, note shot placement, and measure deviation from the bullseye.
- Fire a group of shots aiming at the bullseye, your point of aim.
- Note the impact point of each shot relative to the bullseye.
- Measure the vertical distance between the point of impact and your point of aim in inches or MOA.
- Record this deviation to understand how your rifle shoots at 25 yards.
Knowing this impact point helps you make precise adjustments and ensures your zeroing aligns with the 100-yard target. It’s a simple way to make sure your shots go where you want them to.
Calculate Required Scope Adjustments for 25 Yards
To calculate the scope adjustments needed at 25 yards for a 100-yard zero, you first need to understand how each click affects your point of impact at the shorter distance. Each click, typically ¼ MOA, moves the impact point about ¼ inch at 100 yards.
At 25 yards, that’s roughly 0.0625 inch per click because the distance is a quarter. Ballistic calculations show that to simulate a 100-yard zero at 25 yards, you hold about 4 MOA (around 1 inch) low.
That means you need approximately 16 clicks of adjustment to correct a 1-inch deviation at 25 yards. Accurately calculating these scope adjustments guarantees your zeroing at 25 yards reflects the trajectory you expect at 100 yards, helping you set your impact point precisely.
Adjust Elevation and Windage Turrets Accordingly
Once you understand the necessary adjustments, start by turning the elevation turret to hold the reticle about 1.8 inches below your target at 25 yards, simulating your 100-yard zero.
Next, follow these steps for precise zeroing:
- Use ballistic data to calculate the exact MOA adjustments needed, typically around 4 MOA low for elevation turret settings.
- Adjust windage to center the horizontal impact points, ensuring your scope is level.
- Fire a group to verify where bullets hit relative to your aim point.
- Fine-tune both elevation turret and windage until impacts align perfectly with your simulated zero at 25 yards.
This method ensures your scope’s impact points correspond accurately to a 100-yard zero when shooting at shorter distances.
Fire Follow-Up Groups to Confirm and Fine-Tune Zero
Although you’ve made initial adjustments, you’ll need to fire follow-up groups of 3 to 5 shots at 25 yards to confirm your zero. Aim at the same point with each shot to evaluate the consistency of your impact points.
Take note of whether the group lands above, below, or centered on the bullseye. Use this information to make precise scope adjustments, typically turning the turrets by ¼ MOA increments.
After each adjustment, fire additional follow-up groups to see if the impacts align with your target. This back-and-forth process helps ensure your zero is confirmed and maximizes accuracy.
Keep repeating these steps until your groups consistently hit the desired point. That way, you’ll know your rifle is accurately zeroed at 25 yards for effective shooting at 100 yards.
Record Settings and Practice Consistent Shooting Technique
After confirming your zero with follow-up groups, make sure to document your scope’s current settings, including turret positions and exact impact points. Keeping detailed records helps you maintain a reliable zero and track adjustments effectively.
To practice consistent technique and ensure accurate shot placement, follow these steps:
- Record your scope settings and mark precise impact measurements on your target, such as “1.8 inches low at 25 yards.”
- Use a consistent stance, grip, and breathing pattern every time you shoot.
- Fire groups of at least three shots to verify your zero and note necessary scope adjustments.
- Practice regularly under similar range conditions to build muscle memory and stabilize your zero.
Conclusion
Zeroing your rifle at 25 yards for 100 yards is as straightforward as tuning a guitar before a show. By carefully following each step—mounting your scope, bore sighting, firing precise groups, and making thoughtful adjustments—you’ll guarantee your shots land right where you want.
Remember, consistent technique and recording your settings are key to maintaining accuracy. Stick with it, and your rifle will sing true every time you take aim.
When you zero your rifle at 25 yards for 100 yards, you save time and ammo while ensuring your shots are accurate at longer distances. This method allows shooters to make quick adjustments and get on target faster in the field. With practice, zeroing your rifle becomes second nature, helping you build confidence and precision. So, keep your scope properly mounted, follow the steps carefully, and you’ll enjoy reliable accuracy every time you pull the trigger.