How to Adjust a Rifle Scope in 10 Easy Steps
Start by securely mounting your rifle scope using compatible rings. Make sure it’s perfectly level and properly aligned with your rifle. This is crucial for accurate shooting.
Next, adjust the eyepiece to sharpen the reticle. Set the correct eye relief so you get a clear, comfortable view every time you look through the scope.
Stabilize your rifle before you start adjusting. Then, bore sight the scope to roughly align it with the barrel. This initial alignment saves time and ammo.
After that, fire groups at 25 yards to see where your bullets are hitting. Use the elevation and windage turrets to adjust the point of impact based on those results.
Finally, confirm your zero at 100 yards to ensure your scope is dialed in. Keep your setup steady and consistent throughout the process.
If you want to dive deeper into each step, keep exploring these essential tips for adjusting a rifle scope.
Ensure Proper Scope Mounting and Alignment
Before you begin adjusting your rifle scope, make sure you mount and align it properly. Start by choosing scope rings and mounts compatible with your rifle’s base type, like Weaver or Picatinny, guaranteeing a secure fit.
Position the scope at the correct height to maintain consistent eye relief and shooting posture. Use a torque wrench to tighten the mounting screws to the manufacturer’s specified torque, preventing scope movement during recoil.
Next, check the alignment by placing a bubble level on the reticle and confirming it’s perfectly level with the rifle’s bore. This step eliminates canting and ensures accuracy.
Proper mounting and alignment create a stable foundation, making your subsequent adjustments more effective and reliable. It’s worth taking the time to get this right upfront!
Adjust the Eyepiece for a Clear Reticle
When you rotate the eyepiece diopter ring, you bring the reticle into sharp focus, eliminating any blur or double images. This adjustment is vital for clarity and guarantees your scope delivers a crisp reticle.
To get the best focus, look at a bright, plain background and keep your eye steady in a consistent position. Make your diopter adjustment before zeroing to avoid losing your sharp focus due to turret or magnification changes.
Confirm clarity by checking the reticle from different angles and lighting. It’s a simple step, but it makes a big difference in how clear your reticle appears.
| Step | Action | Result |
|---|---|---|
| Rotate Diopter | Turn eyepiece ring | Sharp reticle focus |
| Maintain Eye | Keep steady eye-to-scope position | Consistent clarity |
| Verify Clarity | Check reticle under various lights | Clear, sharp reticle |
Set the Correct Eye Relief and Position
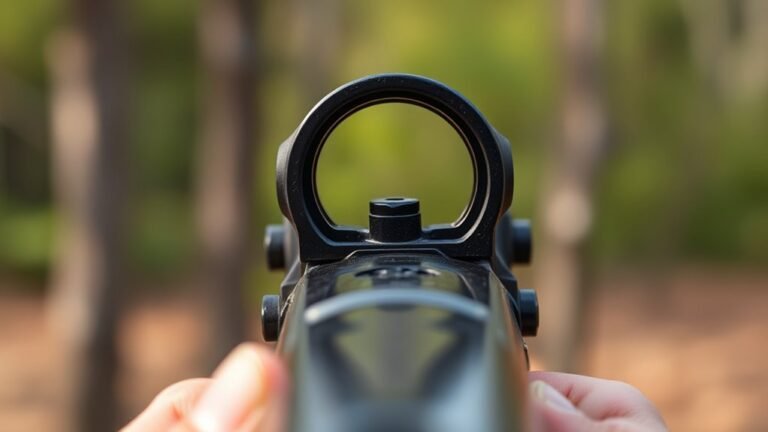
To get the best view through your scope, find the right distance between your eye and the ocular lens—usually about 2 to 4 inches. Keep your head positioned consistently so your eye stays aligned within the scope’s eye box for a clear, centered reticle.
Adjust your scope’s placement on the mount until you can see the full reticle comfortably without any shadows or strain. This way, you’ll have a comfortable and clear sight picture every time you look through the scope.
Find Optimal Eye Distance
Although it might seem simple, finding the ideal eye distance is crucial for a clear, full view through your rifle scope and to prevent scope bite. Eye relief, the distance between your eye and the ocular lens, usually ranges from 2.5 to 3.5 inches.
To find the correct position, adjust your rifle stock and scope mounting so your eye naturally aligns with the reticle during aiming. Move your head slightly side to side while observing the reticle image.
The perfect eye position offers a centered, shadow-free sight picture and a complete field of view. Fine-tune the scope’s fore and aft position to ensure quick target acquisition and comfortable alignment.
This helps maintain accuracy and prevents injury from recoil. So, take your time to get it right—it really makes a difference!
Maintain Consistent Eye Alignment
Since proper eye alignment guarantees a clear, sharp reticle without shadows or black edges, you need to set your eye relief carefully and consistently. Position your eye so the entire reticle is visible with no shadow or black edges, ensuring ideal reticle alignment.
Adjust your shooting stance and cheek weld to maintain eye relief, typically 2.5 to 4 inches, depending on your scope. Keep your head centered directly behind the eyepiece to avoid tilting or leaning forward, which can cause scope bite or misalignment.
Consistently shoulder your rifle the same way, focusing on scope positioning each time. Practicing this routine builds muscle memory, helping you achieve precise reticle alignment shot after shot and preventing errors caused by inconsistent eye relief or scope bite.
Stabilize Your Rifle for Consistent Shooting
You need to stabilize your rifle using supports like a bench rest or bipod to reduce movement during adjustments. Keep your shooting position consistent and minimize any unnecessary motion or recoil.
This steady setup helps you achieve precise and repeatable scope alignment. It makes a big difference when you’re aiming for accuracy. So, take the time to get comfortable and steady before you start shooting.
Use Shooting Supports
How can you verify your shots stay consistent when adjusting your rifle scope? The key is to use a reliable shooting support. Whether it’s a bench, bipod, or sandbags, steady your rifle to eliminate movement that can throw off your shot placement.
Position your rifle support so the rifle stays at the same height and angle for every shot. This reduces human error and keeps things consistent.
This consistency in your shooting position and stance ensures your adjustments are accurate and repeatable. Choose supports that let you easily reach the scope turrets without shifting the rifle.
Maintain Consistent Position
Steadying your rifle with proper supports is just one part of keeping your shots consistent. To maintain a consistent position, focus on your shooting stance and confirm your body stays stable throughout each shot.
Keep your head position steady and establish a reliable cheek weld to maintain the same eye relief every time you look through the scope. Proper alignment between your eye and the scope’s exit pupil is essential to avoid parallax errors and keep the reticle centered on your target.
Avoid shifting your grip or body between shots, as even slight movements can throw off your zero. By combining a solid shooting stance with consistent head and eye positioning, you’ll improve stability and ensure every shot is taken from the exact same posture, enhancing accuracy and repeatability.
Minimize Movement and Recoil
Although maintaining a solid shooting position helps, minimizing movement and recoil is essential to keep your rifle stable and your scope zero intact. Use a stable rest, bipod, or sandbags to enhance stability and reduce rifle movement.
Tighten mounting hardware to prevent recoil from shifting your scope zero during scope adjustment. Keep your shooting position consistent and practice proper breathing and trigger control to avoid jerking that affects accuracy.
Always recheck your rifle’s stability between shots to maintain precise zeroing.
| Action | Purpose | Result |
|---|---|---|
| Use bipod/rest | Support rifle | Reduced movement and recoil |
| Tighten hardware | Secure scope | Maintained zeroing |
| Consistent position | Minimize body movement | Improved stability |
| Controlled breathing | Prevent jerking | Stable shots |
| Recheck stability | Confirm alignment | Accurate scope adjustment |
Bore Sight the Rifle to Align the Scope
Before you start live firing, insert a bore sighting device into your rifle’s chamber or muzzle to project a laser beam aligned with the bore axis. This bore sight helps you quickly achieve initial alignment between the scope and the barrel.
Set up a target at a known distance, typically 25 yards, and adjust the scope’s windage and elevation turrets. Move the reticle to match the laser beam’s point on the target.
Keep the rifle and bore sight stable to ensure the laser stays centered. Once the reticle aligns with the laser beam on the target, you’ve successfully zeroed your scope for a good starting point.
Confirming this alignment reduces time spent during live fire zeroing and ensures more accurate shots when you begin shooting. It’s a simple step that really pays off!
Level the Rifle to Prevent Canting Errors
To prevent canting errors, you need to level your rifle carefully before shooting. Use a bubble level mounted on the rail or scope and align the reticle with a vertical reference downrange.
Keep checking and adjusting the level throughout setup to maintain precise accuracy. It might feel a bit tedious, but staying consistent really pays off in your shot placement.
Importance of Rifle Leveling
When you level your rifle properly, you keep the reticle perpendicular to gravity, which prevents canting errors that can drastically shift your point of impact. Leveling your rifle and scope guarantees accurate zeroing and consistent alignment, critical for long-range precision.
Even a slight cant can throw off your shot, so maintaining perfect leveling is essential to reliable accuracy. It’s one of those small details that makes a big difference when you’re aiming for precision.
| Feeling | Result | Action Needed |
|---|---|---|
| Confidence | Consistent zeroing | Regular leveling |
| Frustration | Missed targets | Avoid canting errors |
| Satisfaction | Precise shots | Check alignment |
| Doubt | Inconsistent hits | Re-level rifle |
Tools for Leveling
Although leveling your rifle might seem straightforward, using the right tools guarantees you eliminate canting errors effectively. Start by placing a bubble level on your rifle’s rail or action to verify it’s perfectly horizontal before mounting the scope.
When you mount the scope, tighten the rings and bases incrementally in a cross pattern to maintain proper alignment and avoid canting. Attach a bubble level to the scope’s turrets or top cap to verify the scope is properly set and aligned with the rifle.
You can also use a plumb line or laser level downrange to confirm the reticle’s vertical alignment with the target. Remember to recheck your leveling regularly, especially after moving or transporting your rifle, to keep your scope and rifle perfectly aligned.
Checking and Correcting Cant
You’ve already seen how using bubble levels on your rifle and scope helps keep everything aligned during mounting. For accurate scope alignment, you need to focus on cant correction by ensuring perfect rifle leveling.
Attach a bubble level to the scope mount and another on the rifle’s rail or receiver to check horizontal alignment. Adjust the rifle’s position until both bubble levels center, indicating true level. Tighten your scope mount hardware securely after confirming alignment.
Fire Initial Groups at Close Range
Before making any scope adjustments, start by firing a three- or five-shot group at 25 yards from a stable position, like prone or benchrest, to establish a reliable initial zero. This initial group helps you understand how your rifle shoots with the current scope zeroing.
Aim carefully at the center of the target, keeping your crosshairs steady. Once you’ve fired, measure the point of impact for each shot relative to your aim point.
Note the horizontal and vertical deviations to determine how far off your target impact is. These measurements guide your next scope adjustments. Although you won’t adjust the windage adjustment or elevation turret just yet, recording this data is essential before moving on to fine-tune your rifle’s accuracy.
Adjust Elevation and Windage Turrets
Adjusting the elevation and windage turrets is the next crucial step to bring your rifle’s point of impact in line with your aim. Start by turning the elevation turret clockwise to lower the impact point or counterclockwise to raise it, usually in ¼ MOA increments.
Then, rotate the windage turret clockwise to shift the impact right or counterclockwise to move it left. Use small adjustments and test shots to avoid over-correcting.
Make sure to confirm the turret markings and directions before making any changes. To guarantee your adjustments work as intended, perform a “box test” on paper targets.
This method helps you verify that your scope’s turret movements correspond accurately to impact shifts. These careful adjustments will get you closer to zeroing your rifle scope precisely.
Confirm Zero at 100 Yards
Once you’ve made initial adjustments with the elevation and windage turrets, it’s time to confirm your zero at 100 yards. Move your target to that distance and fire a three-shot group, aiming at the same point each time.
Measure the impact points against your target image to see if you need to adjust elevation or the windage turret further. Repeat this process until your shots consistently hit the center.
When zeroed at 100 yards, your MOA scope settings will reflect accurate scope zeroing. Make sure to document these settings to maintain precision in future sessions.
| Step | Action |
|---|---|
| 1 | Move target to 100 yards |
| 2 | Fire three-shot group |
| 3 | Measure impact point |
| 4 | Adjust elevation & windage |
| 5 | Repeat until zero confirmed |
Maintain and Troubleshoot Your Scope Zero
Maintaining your scope zero requires regular checks and careful troubleshooting to keep your shots accurate. Begin by regularly inspecting and tightening mounting screws to prevent any slippage that could cause zero loss.
Use a zero stop or turret lock on your adjustment turrets to preserve consistent settings and quickly return to your scope zero after adjustments. Perform tracking verification by making small turret changes and firing groups to ensure your impact shifts match the adjustments.
Keep detailed records of your scope zeroing, including environmental conditions and ammunition used, to aid in troubleshooting. Lastly, include routine scope maintenance by inspecting lenses and turrets for damage or debris, as these factors can affect zero stability and overall accuracy.
Conclusion
Now that you’ve fine-tuned your rifle scope, you’re ready to hit the mark with confidence. Like a painter adjusting their brush, each small tweak brings your target into perfect focus.
Remember, patience and practice are your best allies—keep zeroing in, and your shots will become as precise as clockwork.
With these steps, you’re not just aiming; you’re mastering the art of accuracy. Adjusting a rifle scope takes time, but it’s worth every moment for that perfect shot. So keep practicing, stay patient, and enjoy the precision that comes with a properly adjusted rifle scope.