How to Hold a Pistol in 7 Essential Steps
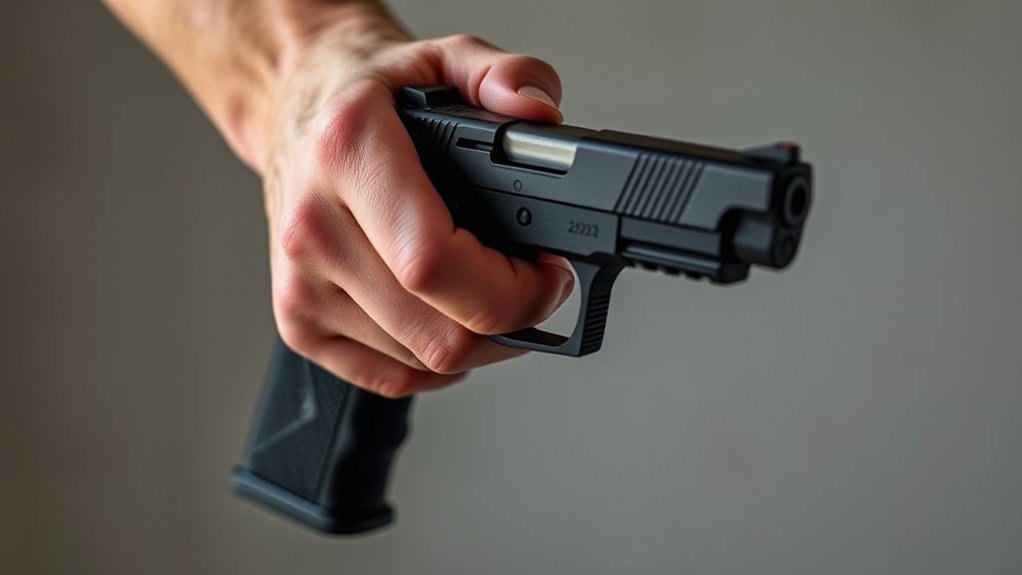
To hold a pistol correctly, start by placing the web of your dominant hand high on the grip. Wrap your fingers firmly around it, making sure your trigger finger stays relaxed and rests outside the trigger guard. This grip gives you better control and helps with accuracy.
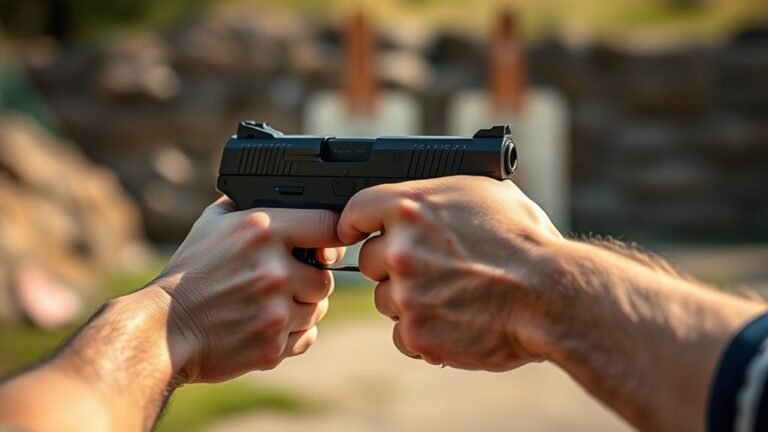
Next, bring your support hand into play. Wrap its fingers around your dominant hand, and line up both thumbs pointing forward. This two-handed hold increases stability and control when shooting.
Keep your wrists straight and aligned with your forearms. Apply balanced, firm pressure without squeezing too hard.
Don’t forget to control your breathing — pause at a full inhale, then press the trigger smoothly.
Stick to these basics, and you’ll quickly see improvements in your aim and confidence.
From here, you can explore more advanced shooting techniques with ease.
Establish a High and Firm Grip
When you establish a high and firm grip on your pistol, you’ll gain better control and stability. Start by placing the web of your dominant hand high on the grip, pressing it firmly against the beavertail.
A high, firm grip on your pistol enhances control and stability for improved shooting performance.
This high grip allows for proper handling and helps you maintain grip strength throughout shooting. Wrap your middle and ring fingers securely around the grip while keeping your trigger finger relaxed outside the trigger guard until you’re ready to pull.
Keep your wrist straight and aligned with your forearm to avoid limp wristing, which can negatively impact accuracy. A good grip isn’t overly tight; it balances firmness with flexibility, enabling smooth pulling the trigger.
This combination of hand and pull technique ensures precise shots and effective recoil management. It’s all about finding that sweet spot between control and comfort.
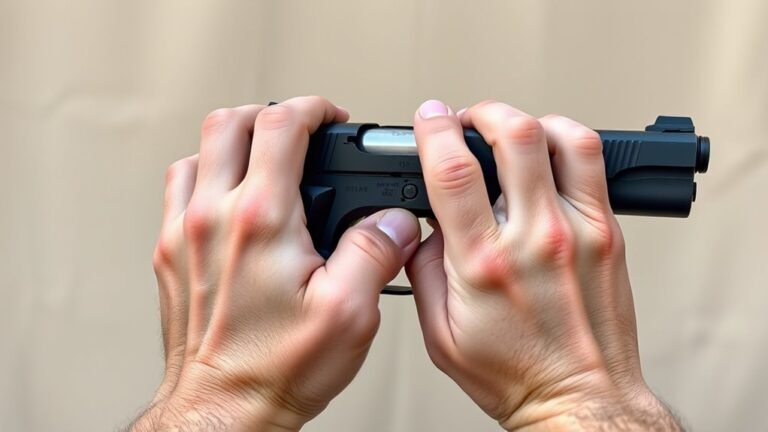
Position Your Support Hand Correctly
After establishing a firm grip with your dominant hand, adding your support hand correctly will enhance stability and control. Wrap your support fingers firmly around your primary hand’s fingers and the trigger guard, making sure there are no gaps that could weaken your hold.
Position your support hand so the thenar, or thumb pad, presses against the pistol frame just below the slide. Keep your support hand thumb pointing forward, aligned alongside your dominant thumb. This improves control and helps manage recoil.
Avoid crossing your support thumb over the primary thumb or hooking fingers in front of the trigger guard. These can reduce stability and compromise safety. A proper support hand grip creates a solid, stable hold that improves accuracy and confidence when firing.
Align Your Wrists and Forearms Properly
Although gripping the pistol firmly is essential, you must also keep your wrists straight and aligned with your forearms to prevent wobbling and improve accuracy. Proper wrist alignment creates a stable platform, reducing unnecessary movement during firing.
Keep your wrists straight and aligned with your forearms for a stable, accurate pistol grip.
When you maintain a firm grip without bending or twisting your wrists, you enhance both stability and control. Your support hand and primary hand should work together, ensuring the forearms form a solid, unified structure.
Avoid overextending your wrists; a slight bend can help absorb recoil but should remain controlled to preserve proper form. Before each shot, consistently check and adjust your wrist alignment and forearm position.
This attention to detail will boost your accuracy and keep your shooting steady and reliable. Just remember, it’s all about keeping things steady and controlled.
Apply Balanced Grip Pressure
To achieve steady shots, you need to apply firm, balanced pressure with both hands, creating a stable grip without squeezing so tightly that your hands shake. Use consistent grip pressure, distributing it evenly between your primary and support hands.
This balance enhances control and helps manage recoil effectively. Apply about 70-80% of your maximum grip strength—enough to prevent shifting but avoiding unnecessary tension.
Keep your trigger finger relaxed to maintain accuracy. As you practice, adjust your grip pressure to find what feels firm yet comfortable, maximizing control and reducing fatigue.
| Grip Pressure | Control | Recoil Management |
|---|---|---|
| Firm but relaxed | Steady hands | Absorb impact |
| Consistent force | Balanced grip | Minimize shift |
| Evenly distributed | Smooth trigger pull | Optimal force |
Maintain Proper Thumb Placement
Applying balanced grip pressure sets the foundation for how you position your thumbs on the pistol. For proper thumb placement, place your support hand thumb lightly along the side of the pistol frame, just below the slide. Make sure it doesn’t interfere with the slide’s movement.
Both thumbs should point forward, with your dominant thumb resting comfortably on the grip’s side and your support thumb just touching the frame to add stability. Avoid crossing your thumbs or pressing the support thumb against the slide or barrel, as this can disrupt firing or cycling.
Keeping your thumbs relaxed and natural helps maintain control without strain or affecting trigger reach. Proper thumb placement aligns the pistol better, improves recoil management, and enhances shooting accuracy. It really all comes down to comfort and control working together.
Use a Two-Handed Hold for Stability
When you use a two-handed hold, you increase stability by spreading recoil forces evenly across both hands.
To get the most from your two-handed grip, grip the pistol firmly with your dominant hand, then wrap your support hand around it, filling any gaps.
Keep both thumbs pointed forward, aligned with the barrel, to enhance control and reduce muzzle flip.
Applying equal pressure with both hands improves recoil management and stability, minimizing shake during firing.
| Aspect | Benefit |
|---|---|
| Two-handed grip | Distributes recoil evenly |
| Support hand | Enhances grip and control |
| Equal pressure | Reduces muzzle flip and shake |
| Thumb alignment | Improves sight alignment |
This steady hold helps you manage recoil effectively, especially during rapid fire. It’s a simple technique that makes a big difference.
Control Your Breathing and Trigger Pull
How exactly you control your breathing and trigger pull can make all the difference in your shooting accuracy. Maintain steady, slow breathing to reduce body movement, which helps keep your sights aligned during your aim.
Before firing, pause briefly at the top of your breath hold to maximize stability and command. As you press the trigger, exhale slowly and lightly to minimize muscle tension and prevent disturbing your aim.
Practice pulling the trigger in a smooth, deliberate manner—avoid jerking or rapid pulls—to ensure consistent shot placement. Incorporate dry fire drills into your routine to develop a feel for slow, controlled trigger pulls without losing your steady aim.
Mastering this control over your breathing and trigger pull enhances your precision every time you shoot. Give it a try—you’ll notice the difference!
Conclusion
Now that you’ve mastered these seven essential steps, you’re holding your pistol like a steady oak in a storm—firm, balanced, and ready. Remember, a solid grip and proper alignment aren’t just about control; they’re about confidence and safety.
Keep practicing each step until it feels natural. You’ll handle your pistol with the precision and calm of a true marksman. Your steady hands will be your greatest ally every time you take aim.
Holding a pistol correctly is key to shooting accurately and safely. By focusing on these essential steps, you’re building skills that improve your control and boost your confidence. So, keep practicing, stay safe, and enjoy the process of becoming a better shooter every time you pick up your pistol.