
10 Steps to Properly Hold a Pistol
To properly hold a pistol, start by positioning your dominant hand high on the grip with your fingers wrapped firmly around the frame. This grip ensures better control and stability when shooting.
Then, place your support hand to fill any gaps for added stability and to help manage recoil.
Keep your wrists aligned with your forearms to maintain a natural shooting stance. This alignment helps reduce fatigue and improves accuracy.
Remember to keep your index finger off the trigger until you’re ready to shoot. When it’s time, place your trigger finger pad straight on the trigger for a smooth pull.
Focus on smooth trigger pulls and steady sight alignment to boost your accuracy. Stick with these steps, and you’ll soon see improvements in your control and precision.
Keep practicing, and you’ll get better in no time!
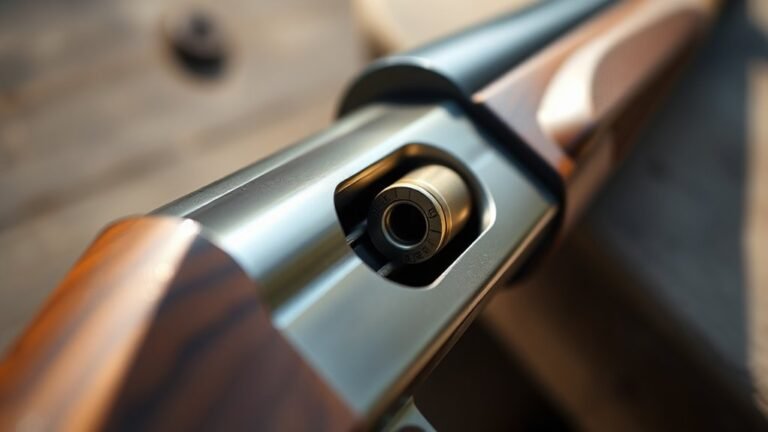
Understand the Anatomy of Your Pistol
Before you can hold your pistol properly, you need to understand its anatomy. The slide is the top part that moves back and forth during firing, housing the barrel, which directs the bullet forward.
The slide is connected to the frame, the main body of the pistol, which includes the trigger guard, backstrap, and grip panels. The trigger sits inside the trigger guard, protecting it from accidental discharge.
The grip is where you place your hand, and the backstrap forms the rear part of the grip, fitting against your palm to help control recoil. Knowing these parts—the slide, frame, trigger, grip, and barrel—helps you handle your pistol safely and effectively.
This foundation is essential before moving on to how you position your hand on the grip.
Position Your Dominant Hand High on the Grip
When you position your dominant hand high on the grip, you gain better control over your pistol’s recoil and accuracy. Place the web of your hand firmly on the backstrap’s curve to support the hold.
Your thumb should align along the frame or slightly forward, syncing with the slide to maximize stability and control. Keeping the grip high aligns the barrel with your forearm, reducing muzzle flip and enhancing aim.
| Aspect | Positioning | Benefit |
|---|---|---|
| Web of Hand | High on backstrap | Better recoil control |
| Thumb | Along frame or slightly forward | Secure grip |
| Barrel Alignment | With forearm | Natural aim & stability |
| Grip Stability | Firm, high hold | Improved shooting accuracy |
Wrap Your Fingers Firmly Around the Frame
Although it might seem simple, wrapping your fingers firmly around the frame is essential for a secure grip and effective recoil control. You need to wrap all four fingers of your dominant hand tightly around the grip, making sure your hold covers the entire frame.
The web between your thumb and index finger should sit high on the backstrap, which improves stability and control. Apply consistent pressure—not too loose, not too tight—to keep the pistol steady without causing fatigue.
Press the base of your palm against the backstrap to further support your grip and minimize movement during firing. By wrapping your fingers properly, you ensure a secure hold that enhances accuracy and helps manage recoil efficiently.
Place Your Support Hand Correctly
After securing your dominant hand firmly around the frame, focus on positioning your support hand to boost stability and control. Place your support hand slightly forward of your shooting hand, filling the gap between your palm and fingers to maximize grip stability.
Wrap all your support hand fingers securely around the grip, ensuring your palm makes firm contact with the surface. Position your support thumb along the frame or just ahead of your shooting thumb, depending on your grip style, to enhance control.
Keep your support hand fingers relaxed yet firm—too much tension can cause shakiness when firing. Align the metacarpal bones of your support hand with those of your shooting hand to create a unified, stable grip that improves overall pistol handling and accuracy.
Align Your Wrists and Arms Properly
How you align your wrists and arms plays a crucial role in maintaining control and accuracy while shooting. Start by keeping your wrists straight and aligned with your forearms, ensuring proper wrist alignment to prevent wobbling.
Maintain a neutral wrist position—avoid bending or twisting during firing—to promote consistent accuracy. Your shooting stance should enable both arms to be slightly bent, providing solid arm support and stability.
Use a firm grip that’s steady yet relaxed; this balance supports control without causing fatigue or shaking. Position your support hand to fill any gaps, reinforcing the shooting hand and promoting correct wrist alignment.
Apply Balanced Grip Pressure
When you apply balanced grip pressure, you control recoil effectively without causing hand fatigue or shaking. To do this, use a firm grip that presses your palm and fingers firmly against the pistol’s grip frame, known as a crush grip. This ensures pistol stability and helps control recoil smoothly.
Balance the pressure evenly between your dominant and support hands. Keep your hand tension tight enough for control but not so tight it causes tremors.
Keep your grip pressure consistent throughout your shooting session to promote accuracy and muscle memory. Regularly evaluate and adjust your grip pressure during practice to find the ideal balance between controlling recoil and comfort.
Maintain consistent grip pressure to enhance accuracy and build reliable muscle memory during practice.
A consistent grip pressure is key to steady shots and improved pistol handling. So, take your time to get it right—it makes a big difference!
Keep Your Index Finger Outside the Trigger Guard
Although it might feel natural to rest your index finger on the trigger, you should keep it outside the trigger guard until you’re ready to fire.
This practice enhances safety, prevents accidental discharges, and promotes proper grip and handling.
Keeping your index finger outside the trigger guard allows better trigger control when you do engage the trigger.
| Aspect | Benefit | Reason |
|---|---|---|
| Index Finger | Outside Trigger Guard | Prevents accidental firing |
| Handling | Safer | Reduces unintentional pulls |
| Proper Grip | Maintains Control | Enhances shooting discipline |
| Trigger Control | Smooth Engagement | Prepares for precise shots |
Adopting this habit ensures disciplined handling and maximizes safety every time you draw or reholster your pistol.
It’s a simple step that really makes a difference. So, keep that finger off the trigger until you’re truly ready.
Position Your Trigger Finger Pad on the Trigger
Once you’ve kept your index finger outside the trigger guard for safety, the next step is to position the pad of your trigger finger correctly on the trigger itself. Proper placement of the trigger pad ensures a straight, consistent press, which is crucial for shot accuracy.
Keep your index finger outside the trigger guard, then place your trigger finger pad correctly for accurate, consistent shots.
Here’s how to achieve control:
- Rest the trigger finger pad centrally on the trigger for even pressure.
- Apply smooth pressure using the trigger pad to avoid jerky movements.
- Maintain contact during the trigger squeeze to prevent pulling shots sideways.
This positioning prevents leverage issues that lead to pulling shots left or right and enhances shot consistency. It’s especially important during rapid or precision firing.
Master Sight Alignment and Sight Picture
To master sight alignment and sight picture, you need to focus sharply on the front sight while keeping the rear sight notch aligned and level. Confirm the front sight is centered in the rear notch with equal light gaps on both sides for proper sight alignment.
Your eyes should lock on the front sight, making it crisp and clear, while the target and rear sight stay slightly blurred. Maintain a consistent sight picture by keeping the front sight, rear sight, and target in a straight line.
Use your proper pistol grip and steady hold to prevent movement that could disrupt alignment. Avoid jerky movements, and remember that a smooth, steady trigger pull complements your sight picture for accurate shooting.
Practice a Smooth and Controlled Trigger Pull
To improve your trigger control, place the pad of your index finger on the trigger and press straight back without jerking or sideways movement.
Focus on applying steady, consistent pressure to guarantee a smooth release. Avoid sudden pulls that can throw off your shot.
Practice maintaining control with each trigger press. It really helps to build muscle memory and confidence.
Finger Placement Precision
Although mastering your grip is crucial, finger placement on the trigger plays an equally important role in accuracy. Proper trigger finger position ensures your shots are precise and controlled.
Focus on these key points for effective trigger control: Position the pad of your trigger finger directly on the center of the trigger for straight rearward pressure and consistent trigger placement.
Apply smooth, steady pressure during your trigger press—avoid jerking or squeezing to maintain trigger technique and accuracy.
Practice slow, deliberate trigger pulls and dry firing exercises to build muscle memory and reinforce proper trigger finger placement. It really helps to get that feel down right.
Consistent Trigger Pressure
Now that you’ve nailed the proper finger placement on the trigger, it’s important to focus on applying consistent pressure throughout your trigger pull.
To maintain good trigger control, use the pad of your index finger to press the trigger straight rearward with steady pressure. Avoid any jerking or sudden movements; instead, practice a smooth, controlled trigger squeeze that gradually releases the shot.
This steady pressure helps prevent the firearm from shifting, which directly improves shot accuracy and tightens shot grouping. You can develop muscle memory for this slow, even trigger pull by practicing dry firing regularly.
Avoid Jerky Movements
When you apply gradual, even pressure on the trigger, you keep your aim steady and avoid jerky movements that throw off your shot. Proper trigger control demands a smooth, consistent trigger squeeze, aligning your finger with the trigger’s center for even pressure.
Jerky movements often cause shot dispersion, harming shooting accuracy. To improve, focus on these steps:
- Practice slow, steady trigger pulls to develop a rhythm and enhance control.
- Use dry fire drills regularly to build muscle memory for a deliberate, smooth trigger pull.
- Avoid sudden jerks or quick pulls that disrupt your aim and reduce precision.
Conclusion
Remember when you first learned to ride a bike? Holding a pistol properly is just like that—balance and control make all the difference.
By following these steps, you’ll build a steady grip and confident aim, much like steadying those first pedals. Practice regularly, and soon your handling will feel as natural as riding downhill with the wind at your back.
Stay focused, and your skills will sharpen with every shot you take. Proper pistol handling isn’t just about strength; it’s about technique and consistency. So keep practicing these 10 steps to properly hold a pistol, and you’ll develop the control and confidence needed for safe, accurate shooting. With time, your grip and aim will become second nature, making your shooting experience safer and more enjoyable.